Nirvana Labs remote provisioning
Altinity.Cloud can operate inside your Nirvana Labs account. We’ll go through the steps required to create a BYOC environment here. The steps are:
- Create a new project in your Nirvana Labs account.
- Create an API key in your Nirvana Labs account.
- Log in to your Altinity.Cloud account. If you don’t have one already, sign up for a trial account. (We’ll wait here.)
- Create a new Altinity.Cloud BYOC environment through the Altinity Cloud Manager.
- Enter your Nirvana project name and API key, then click PROCEED.
After a few minutes, your Nirvana BYOC environment will be up and running. We’ll cover these steps in detail now.
Create a project in your Nirvana Labs account
From the Nirvana Labs Console, go to your list of projects and click the Create Project button at the top of the list:
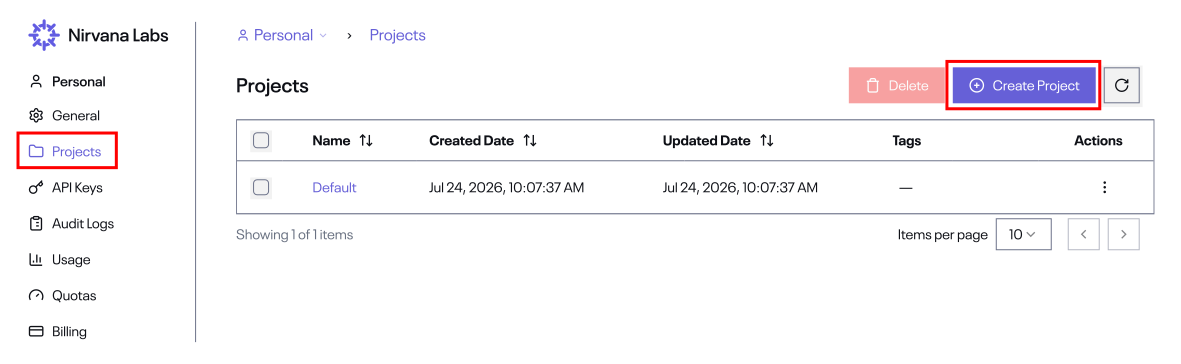
Figure 1 - Creating a new project
Give your new project a new name and any tags you need. When you’re ready, click Create:
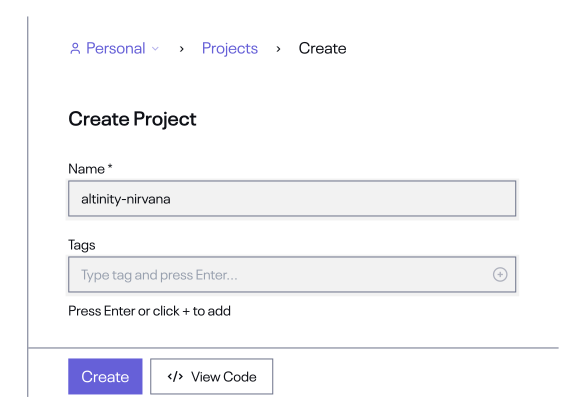
Figure 2 - The Add a new project dialog
In a few seconds, you’ll see your new project in the console.
Create an API key in your Nirvana account
With your project created, you need to create an API key. Click the API Keys link in the left navigation panel of the project page, then click Create API Key.
In the Create API Key dialog, give your token a name, assign it to the project you just created, edit the resource permissions (we’ve deleted most of them from Figure 3, by the way), give it an expiration date, any tags you want, and configure any other options you need. When everything looks good, click the Create button:
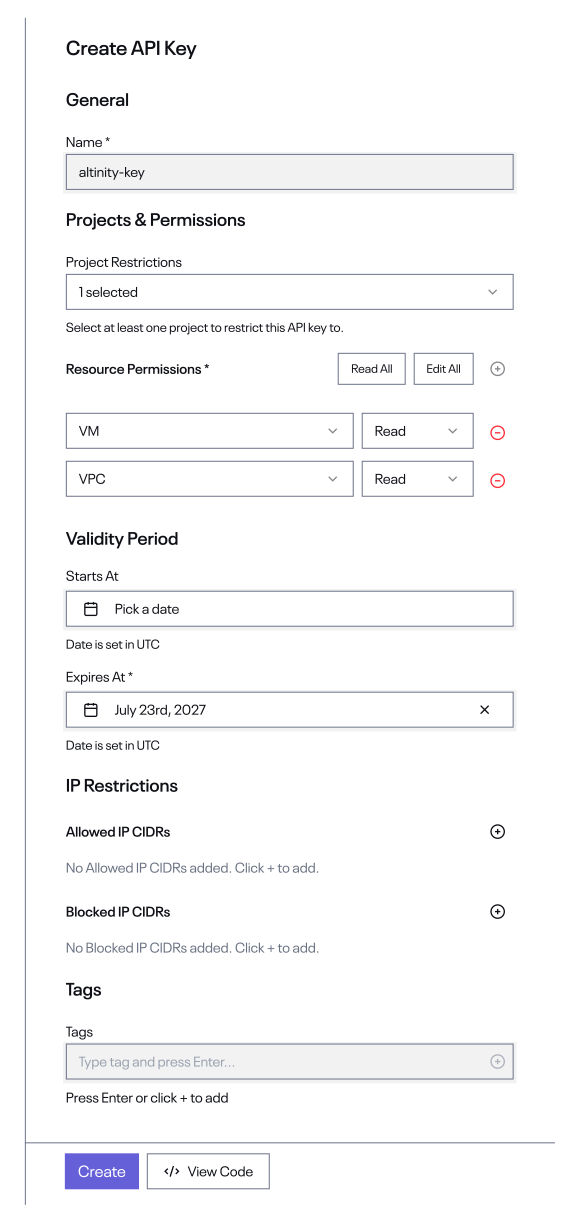
Figure 3 - The Create API Key dialog
Your new token will be created shortly. Click the  eye icon to see the token. Be sure to make a copy of it somewhere; you won’t be able to see it again.
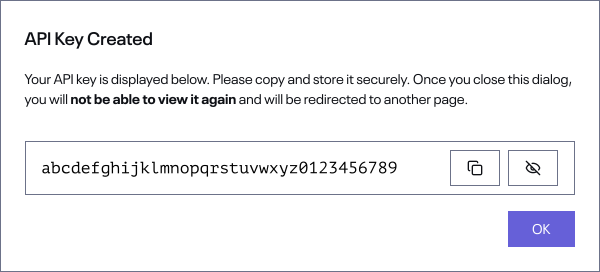
Figure 4 - The new API token
Your new token will show up in the list of tokens. With your project and API key set up, you’re ready to create a BYOC environment.
Create a new Altinity.Cloud BYOC environment with the Altinity Cloud Manager
Now it’s time to create a new environment. Log in to your Altinity.Cloud account and go to the Environments tab in the left navigation. Click the  button to create a new Environment. In the Environment Setup dialog, give your environment a name, select Nirvana Labs, choose a region, then Bring your own cloud account:
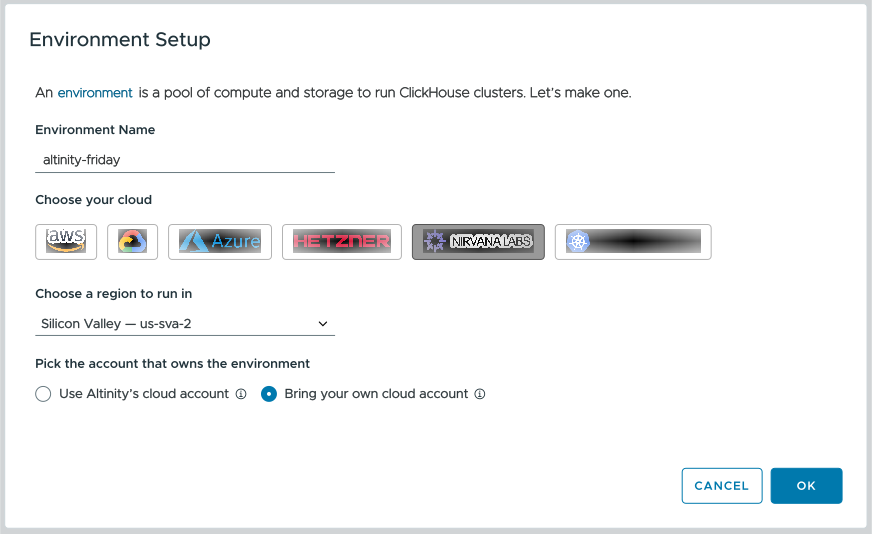
Figure 5 - Creating a Nirvana BYOC environment
(Complete details on setting up an environment are available elsewhere in the docs.) Click OK to start the environment creation process.
The Configuration Setup tab
The Connection Setup tab looks like this:
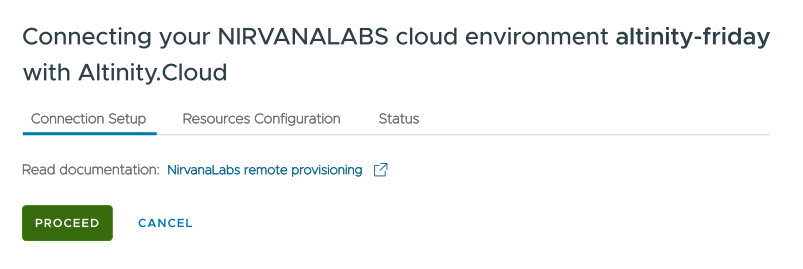
Figure 6 - The Nirvana BYOC Connection Setup tab
Clicking the documentation link takes you to this page. (If you clicked it, welcome back!). Click PROCEED to continue to the Resources Configuration tab.
The Resources Configuration tab
Things get more interesting here:
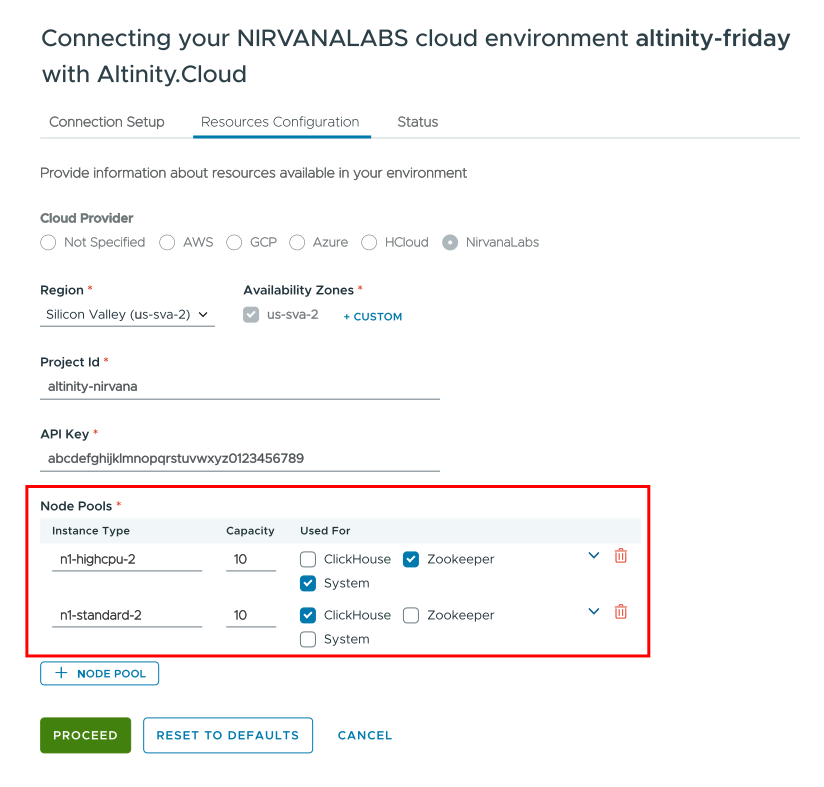
Figure 7 - The Nirvana BYOC Resources Configuration tab
Select a region and one or more availability zones if needed, then enter your project ID and API key. Node pools are a bit more complicated. Next, you need at least one node pool for ClickHouse, Zookeeper, and System nodes. Delete any node pools you don’t need with the  trash can icon.
Once you’ve selected a node pool for all three types of nodes, the PROCEED button will become active. Click it to start provisioning your BYOC environment.
The Status tab
As your Nirvana BYOC environment is being provisioned, you can watch the log to see how things are progressing. Click the VIEW LOG link to see system messages:
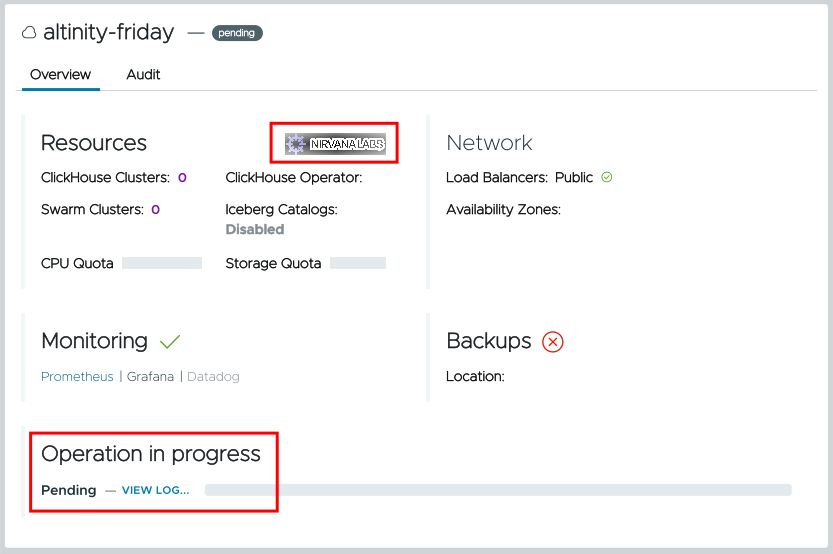
Figure 8 - Provisioning status
If provisioning stalls, contact Altinity support for help.
The Environments dashboard
When provisioning is done, you’ll see the ACM Environments dashboard with the details of your environment;
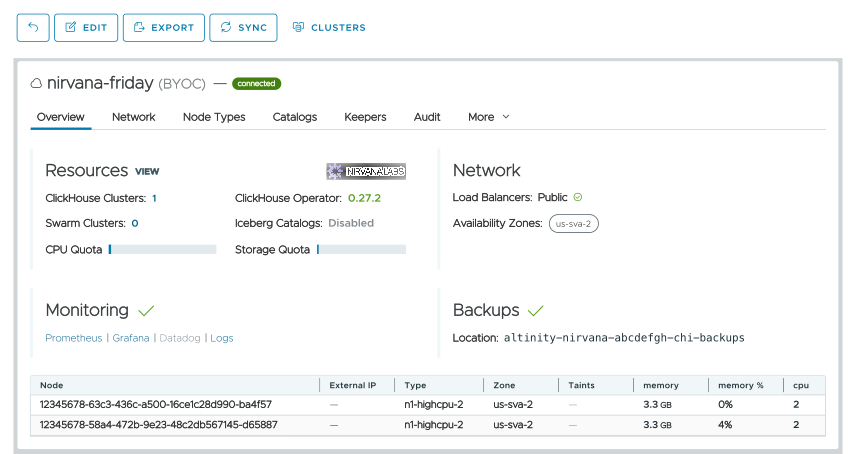
Figure 9 - ACM Environments dashboard
Click the  button to see your ClickHouse clusters. You won’t have any, of course, so see the Creating a new Cluster page to get started.