Integrating Tableau with ClickHouse®
Tableau Desktop allows users to draw data from multiple sources, including spreadsheets and databases. The following steps detail how to add the ClickHouse Connector to Tableau Desktop. Examples are provided for using specific tables and SQL based queries with a Tableau workbook.
Installation
Prerequisites
Before installing the ClickHouse connector with Tableau Desktop, the following prerequisites must be installed:
- The ClickHouse ODBC Driver. Note that an ODBC DSN is not required to be generated, just the ClickHouse ODBC Driver installed.
- Tableau Desktop installed for Microsoft Windows or Apple OS X. Version 2020.2 or above is required.
- A Tableau account to access their Extension gallery.
ClickHouse Connector Installation
The following steps use the Windows version of Tableau Desktop as a basis for the examples. For more information on installing a Tableau Connector, see the Tableau documentation article Run Your Connector.
The following process will install the ClickHouse Connector for Tableau Desktop for Microsoft Windows.
There are three methods of installing the ClickHouse Connector for Tableau Desktop:
- Install the ODBC Driver Version
- Download from Tableau Coming Soon
- Install from Tableau Desktop Coming Soon
Install the ODBC Driver Version
The clickhouse-tableau-connector-odbc allows users to manually install an ODBC compliant driver that connect Tableau Desktop or Tableau Server to a ClickHouse server.
The installation steps below are geared towards a Windows 10 based installation of Tableau Desktop. For full details of installing a ODBC compliant Tableau connector, see the Tableau Run Your Connector site.
The instructions assume that Tableau Desktop is installed in C:\Program Files\Tableau\Tableau 2021.1. Please adjust these instructions based on your installation of Tableau Desktop.
To manually install the ODBC version of the ClickHouse connector:
-
Install the ClickHouse ODBC driver. See the ClickHouse ODBC Driver page for more details.
-
Download the clickhouse-tableau-connector-odbc by one of the following methods:
-
From the GitHub repository, select Code -> Download Zip and extract the ZIP file to a folder.
-
Using the following command:
git clone https://github.com/Altinity/clickhouse-tableau-connector-odbc
-
-
Create a directory for Tableau connectors. If these are only to be used by the logged in user, then the directory should be in your local user directory
[username]\Documents\TableauConnectorsdirectory. For example, if your username isjhummel, then this would be located underc:\Users\jhummel\Documents\TableauConnectorsdirectory. -
From the
clickhouse-tableau-connector-odbcfolder, copy the foldertableau_odbc_connectorto the Tableau connectors folder created in the previous step.- For example: If the username is
jhummel, and the Tableau connectors directory is inc:\Users\jhummel\Documents\TableauConnectors, then theclickhouse-tableau-connector-odbcwould be placed inC:\Users\jhummel\Documents\TableauConnectors\tableau_odbc_connector.
- For example: If the username is
-
Run the Tableau Desktop with either of following options:
-
From the Command Line: Run
tableau.exewith the following options, replacing{Your Connector Directory}with the directory for your custom Tableau Connectors as created in the steps above:tableau.exe -DConnectPluginsPath={Your Connector Directory}For example:
tableau.exe -DConnectPluginsPath=C:\Users\jhummel\Documents\TableauConnectors
-
From a Windows Shortcut: To create a customized Windows shortcut, copy the Tableau Desktop shortcut, and add the custom Tableau Connectors directory option after the
tableau.exepath. For example:"C:\Program Files\Tableau\Tableau 2021.1\bin\tableau.exe" -DConnectPluginsPath=C:\Users\jhummel\Documents\TableauConnectors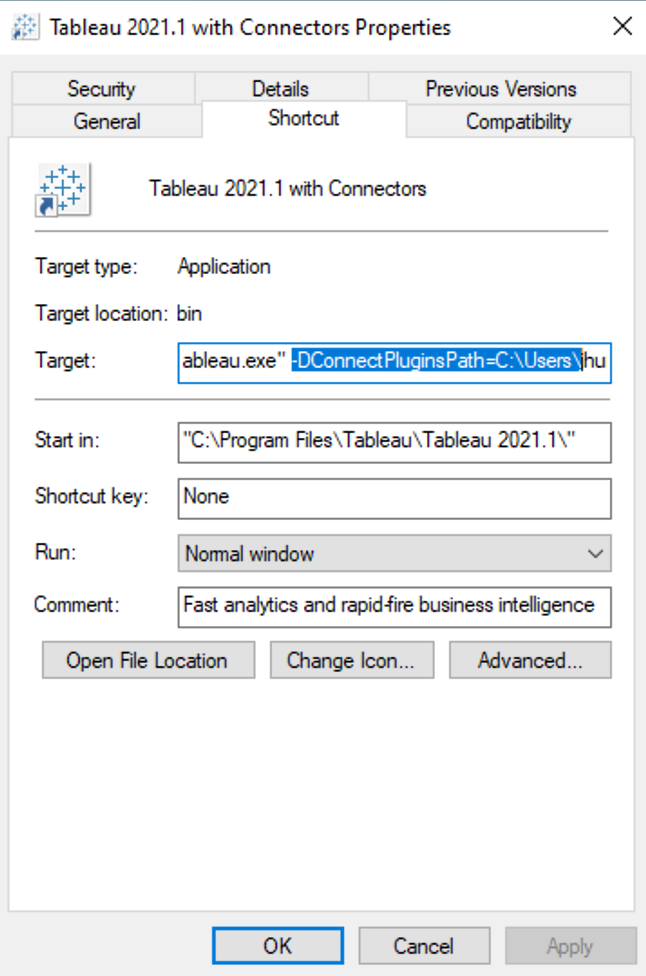
-
Connect to ClickHouse
After the ClickHouse connector has been installed, Tableau Desktop can be connected to a ClickHouse server.
To connect Tableau Desktop to a ClickHouse server:
-
Launch Tableau Desktop.
-
From the Connect menu, select To a Server -> More.
-
Select ClickHouse by Altinity Inc.
-
Enter the following:
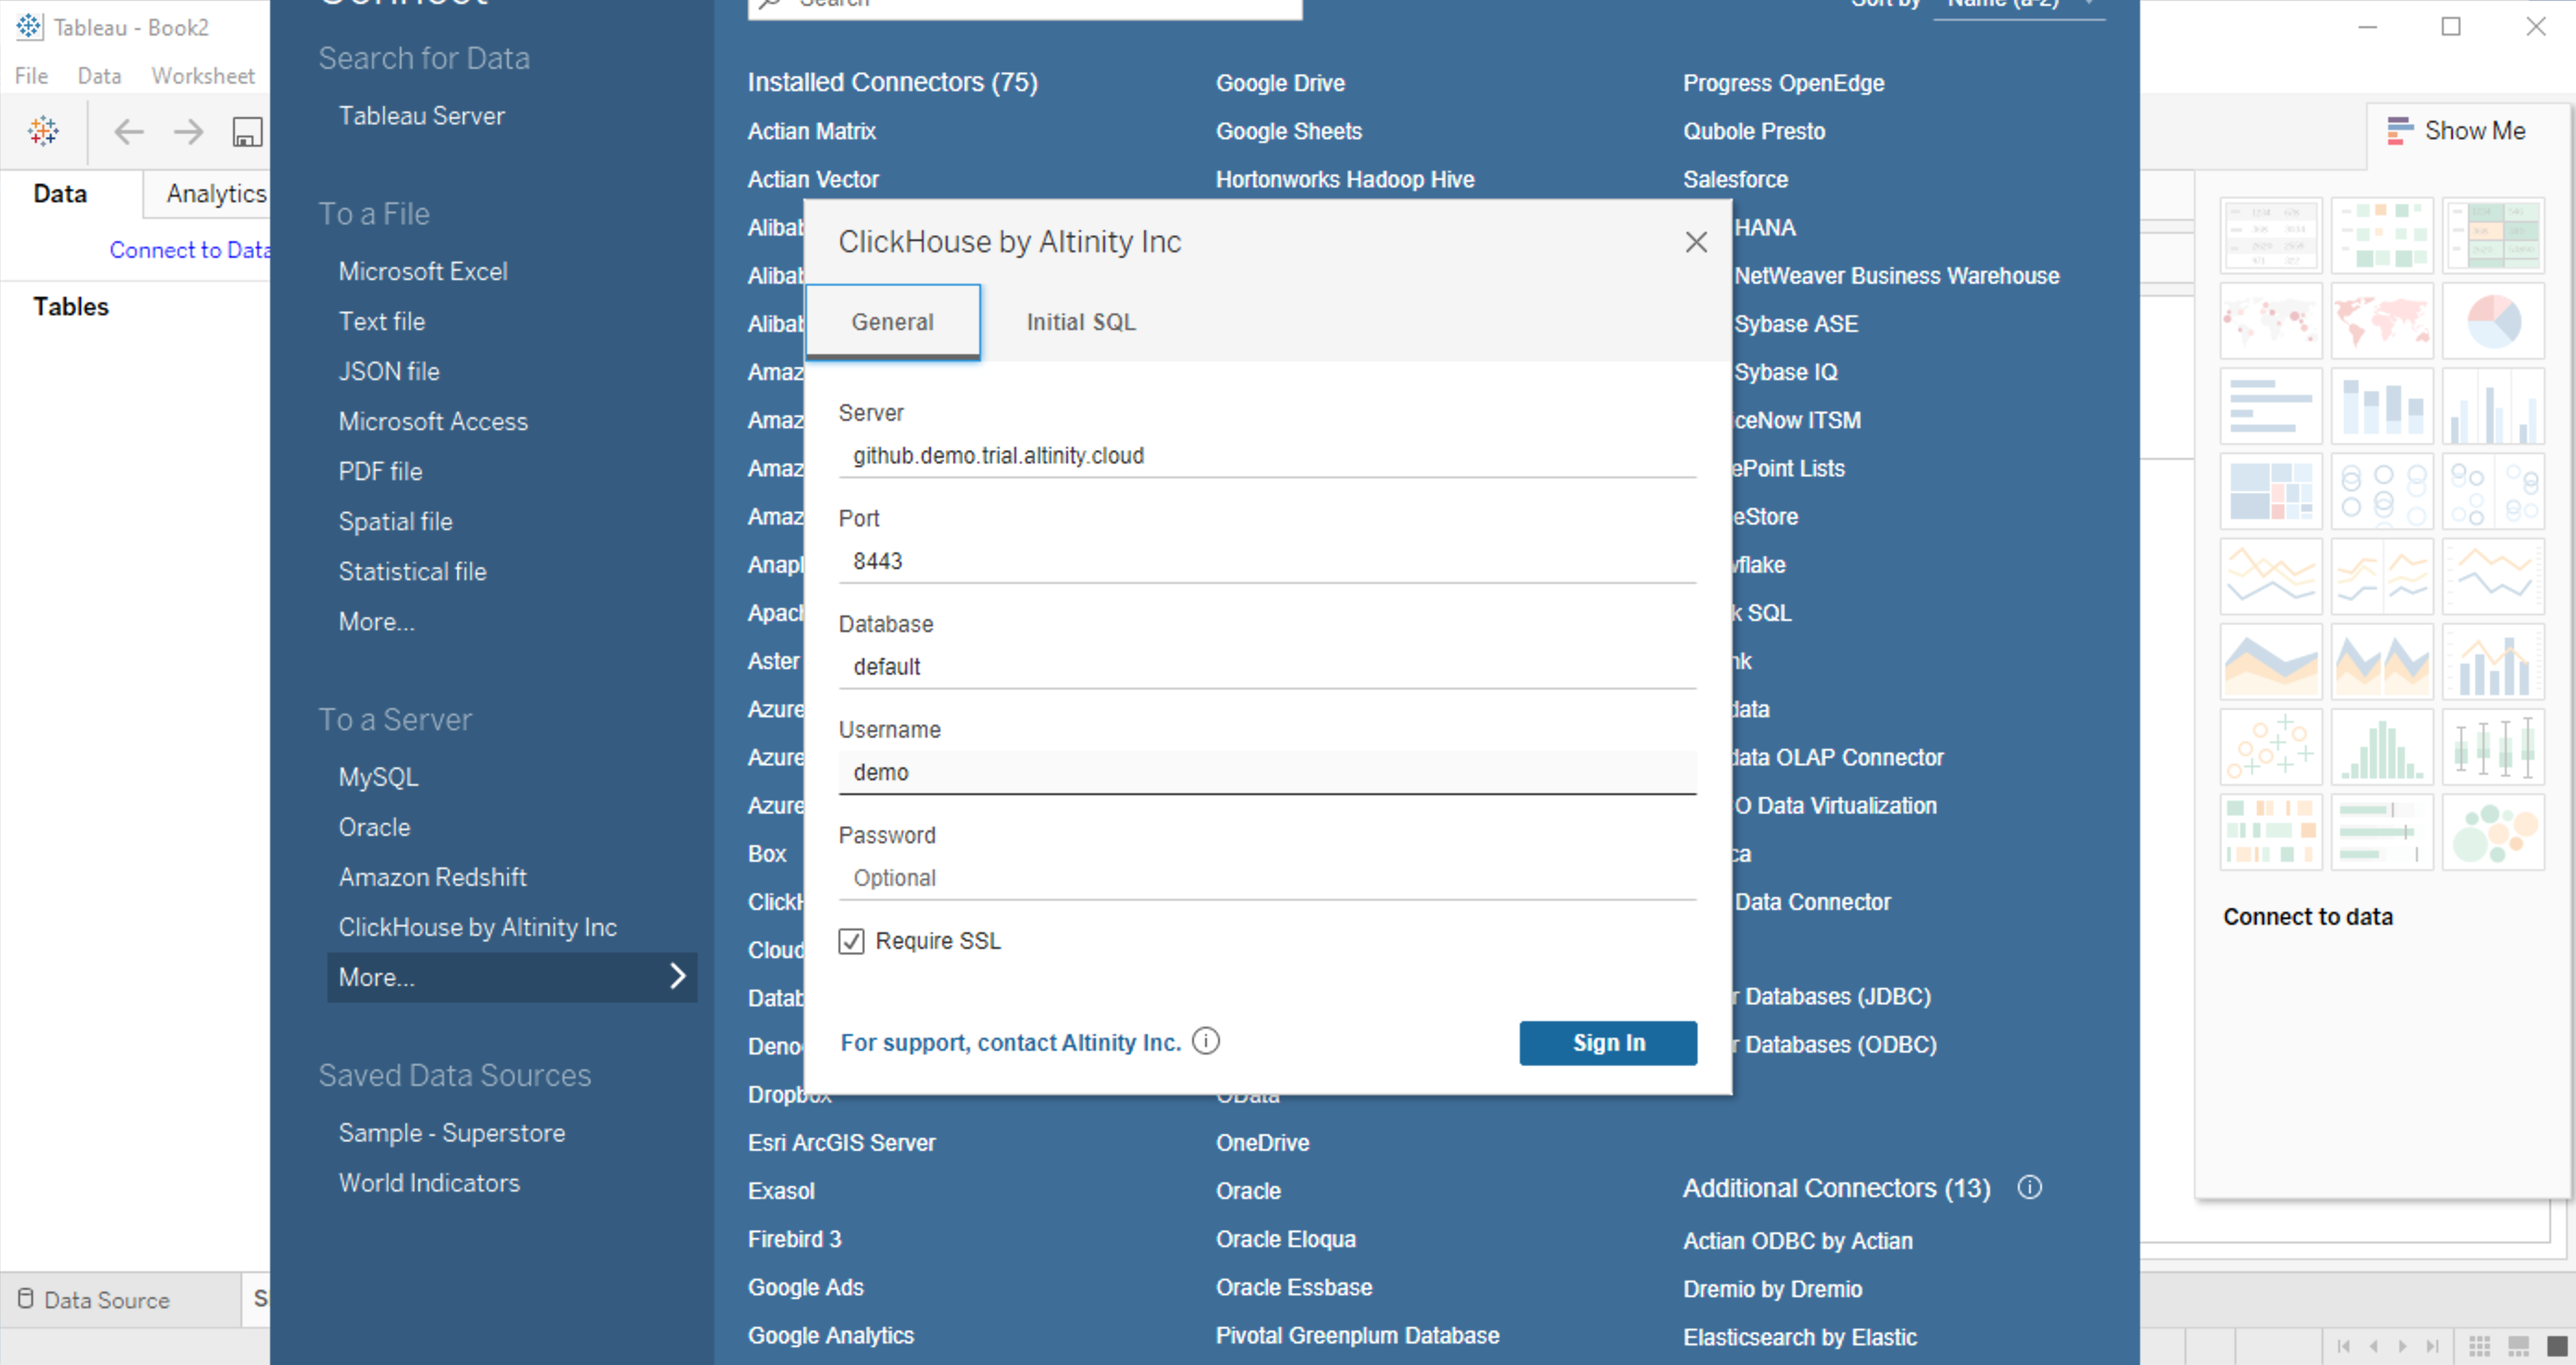
- Server: The name of the ClickHouse database server, either by hostname or IP address.
- Port: The HTTP (8123) or HTTPS port (8443).
- Database: The name of the ClickHouse database to use.
- Username: The ClickHouse user used to authenticate to the database.
- Password (Optional): The ClickHouse user password.
- Require SSL (Optional): Select if the connection uses SSL.
Tableau with ClickHouse Connection Examples
Tableau supports multiple methods of data extraction, from single tables, to selecting multiple tables and connecting fields, to creating a virtual table from a SQL query.
For full details on Tableau sheets, dashboards, charts and other features, see the Tableau Desktop documentation site.
The following examples demonstrate using a ClickHouse database connected to Tableau. The first uses a single ClickHouse table, while the second uses a SQL query.
For this example, we will be using data from a publicly available ClickHouse database server hosted on Altinity.Cloud. This allows new ClickHouse users to test queries and connection methods. Use the following settings for this sample ClickHouse database:
- Server: github.demo.trial.altinity.cloud
- Port: 8443
- Database: default
- Username: demo
- Password: demo
- Require SSL: Enabled
Single ClickHouse Table Example
To create a sheet populated with data from a ClickHouse database table:
-
Verify that the ClickHouse Connector for Tableau is installed and the connection is working. For more information, see ClickHouse Connector Installation.
-
Select File -> New.
-
Select Connect to Data.
-
Verify the connection information, then select Sign In.
-
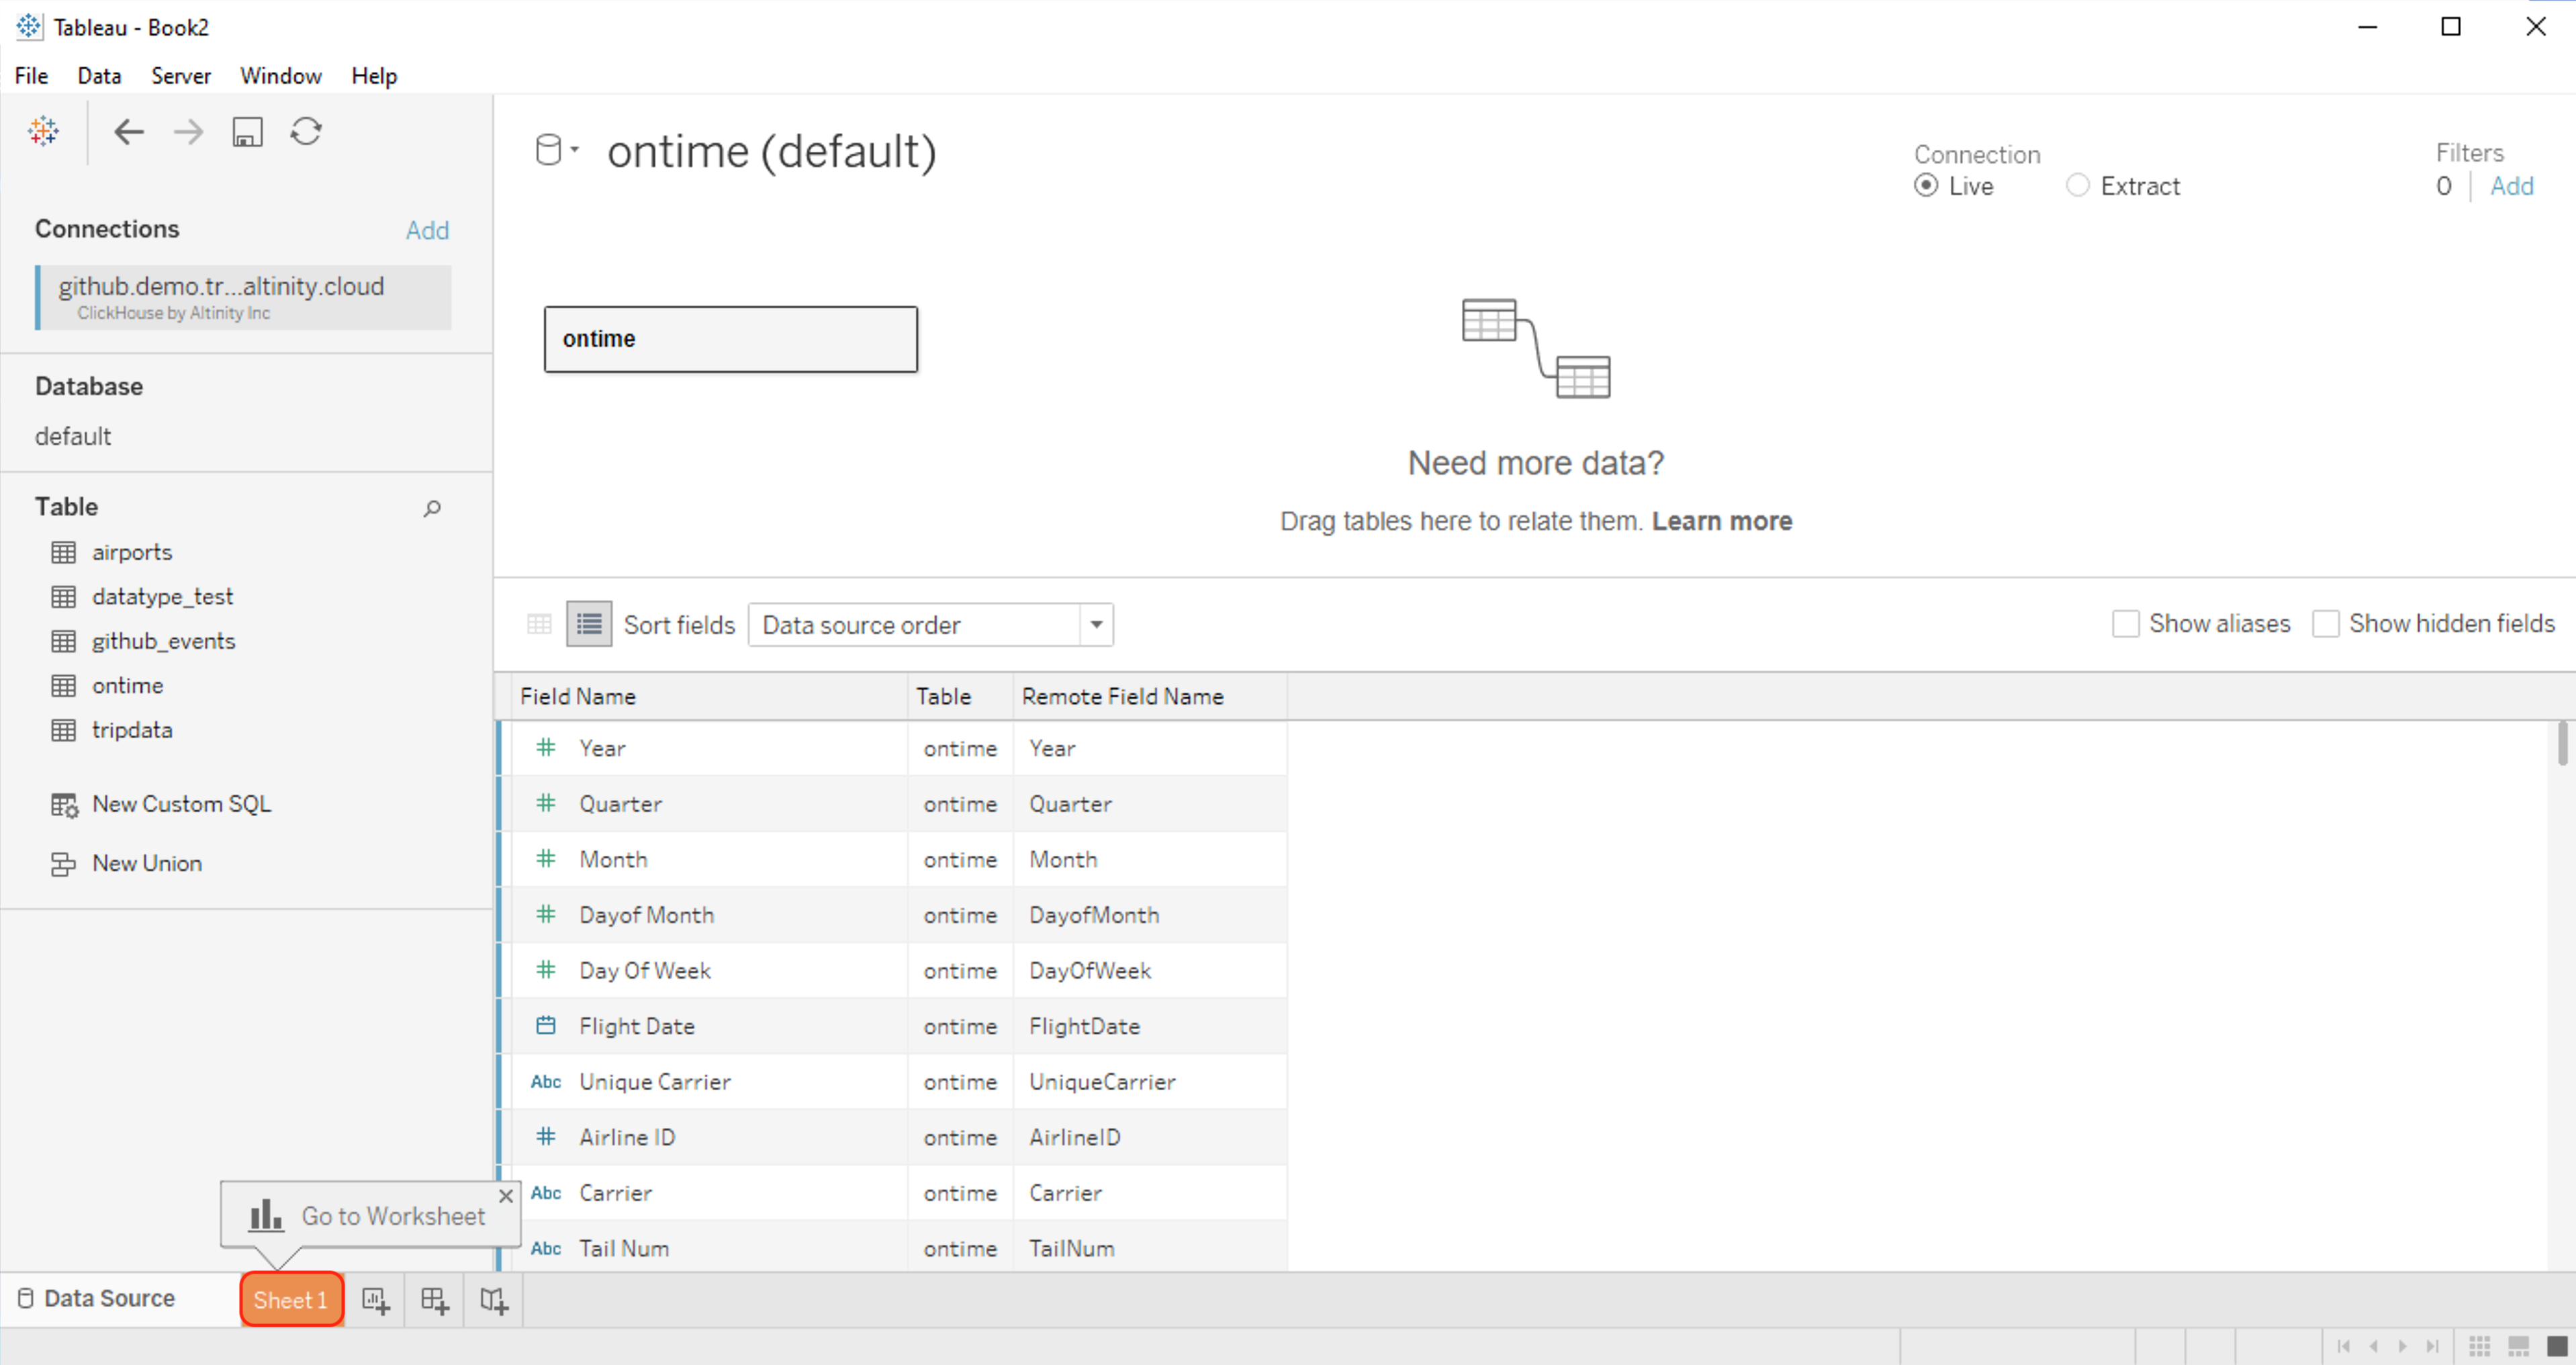
Drag the table that will be used for the Tableau sheet. Verify that Live is selected - this determines that Tableau will connect to the ClickHouse server upon request, rather than trying to download the data locally.
-
Select the sheet at the bottom - typically this will be Sheet 1 for a new workbook.
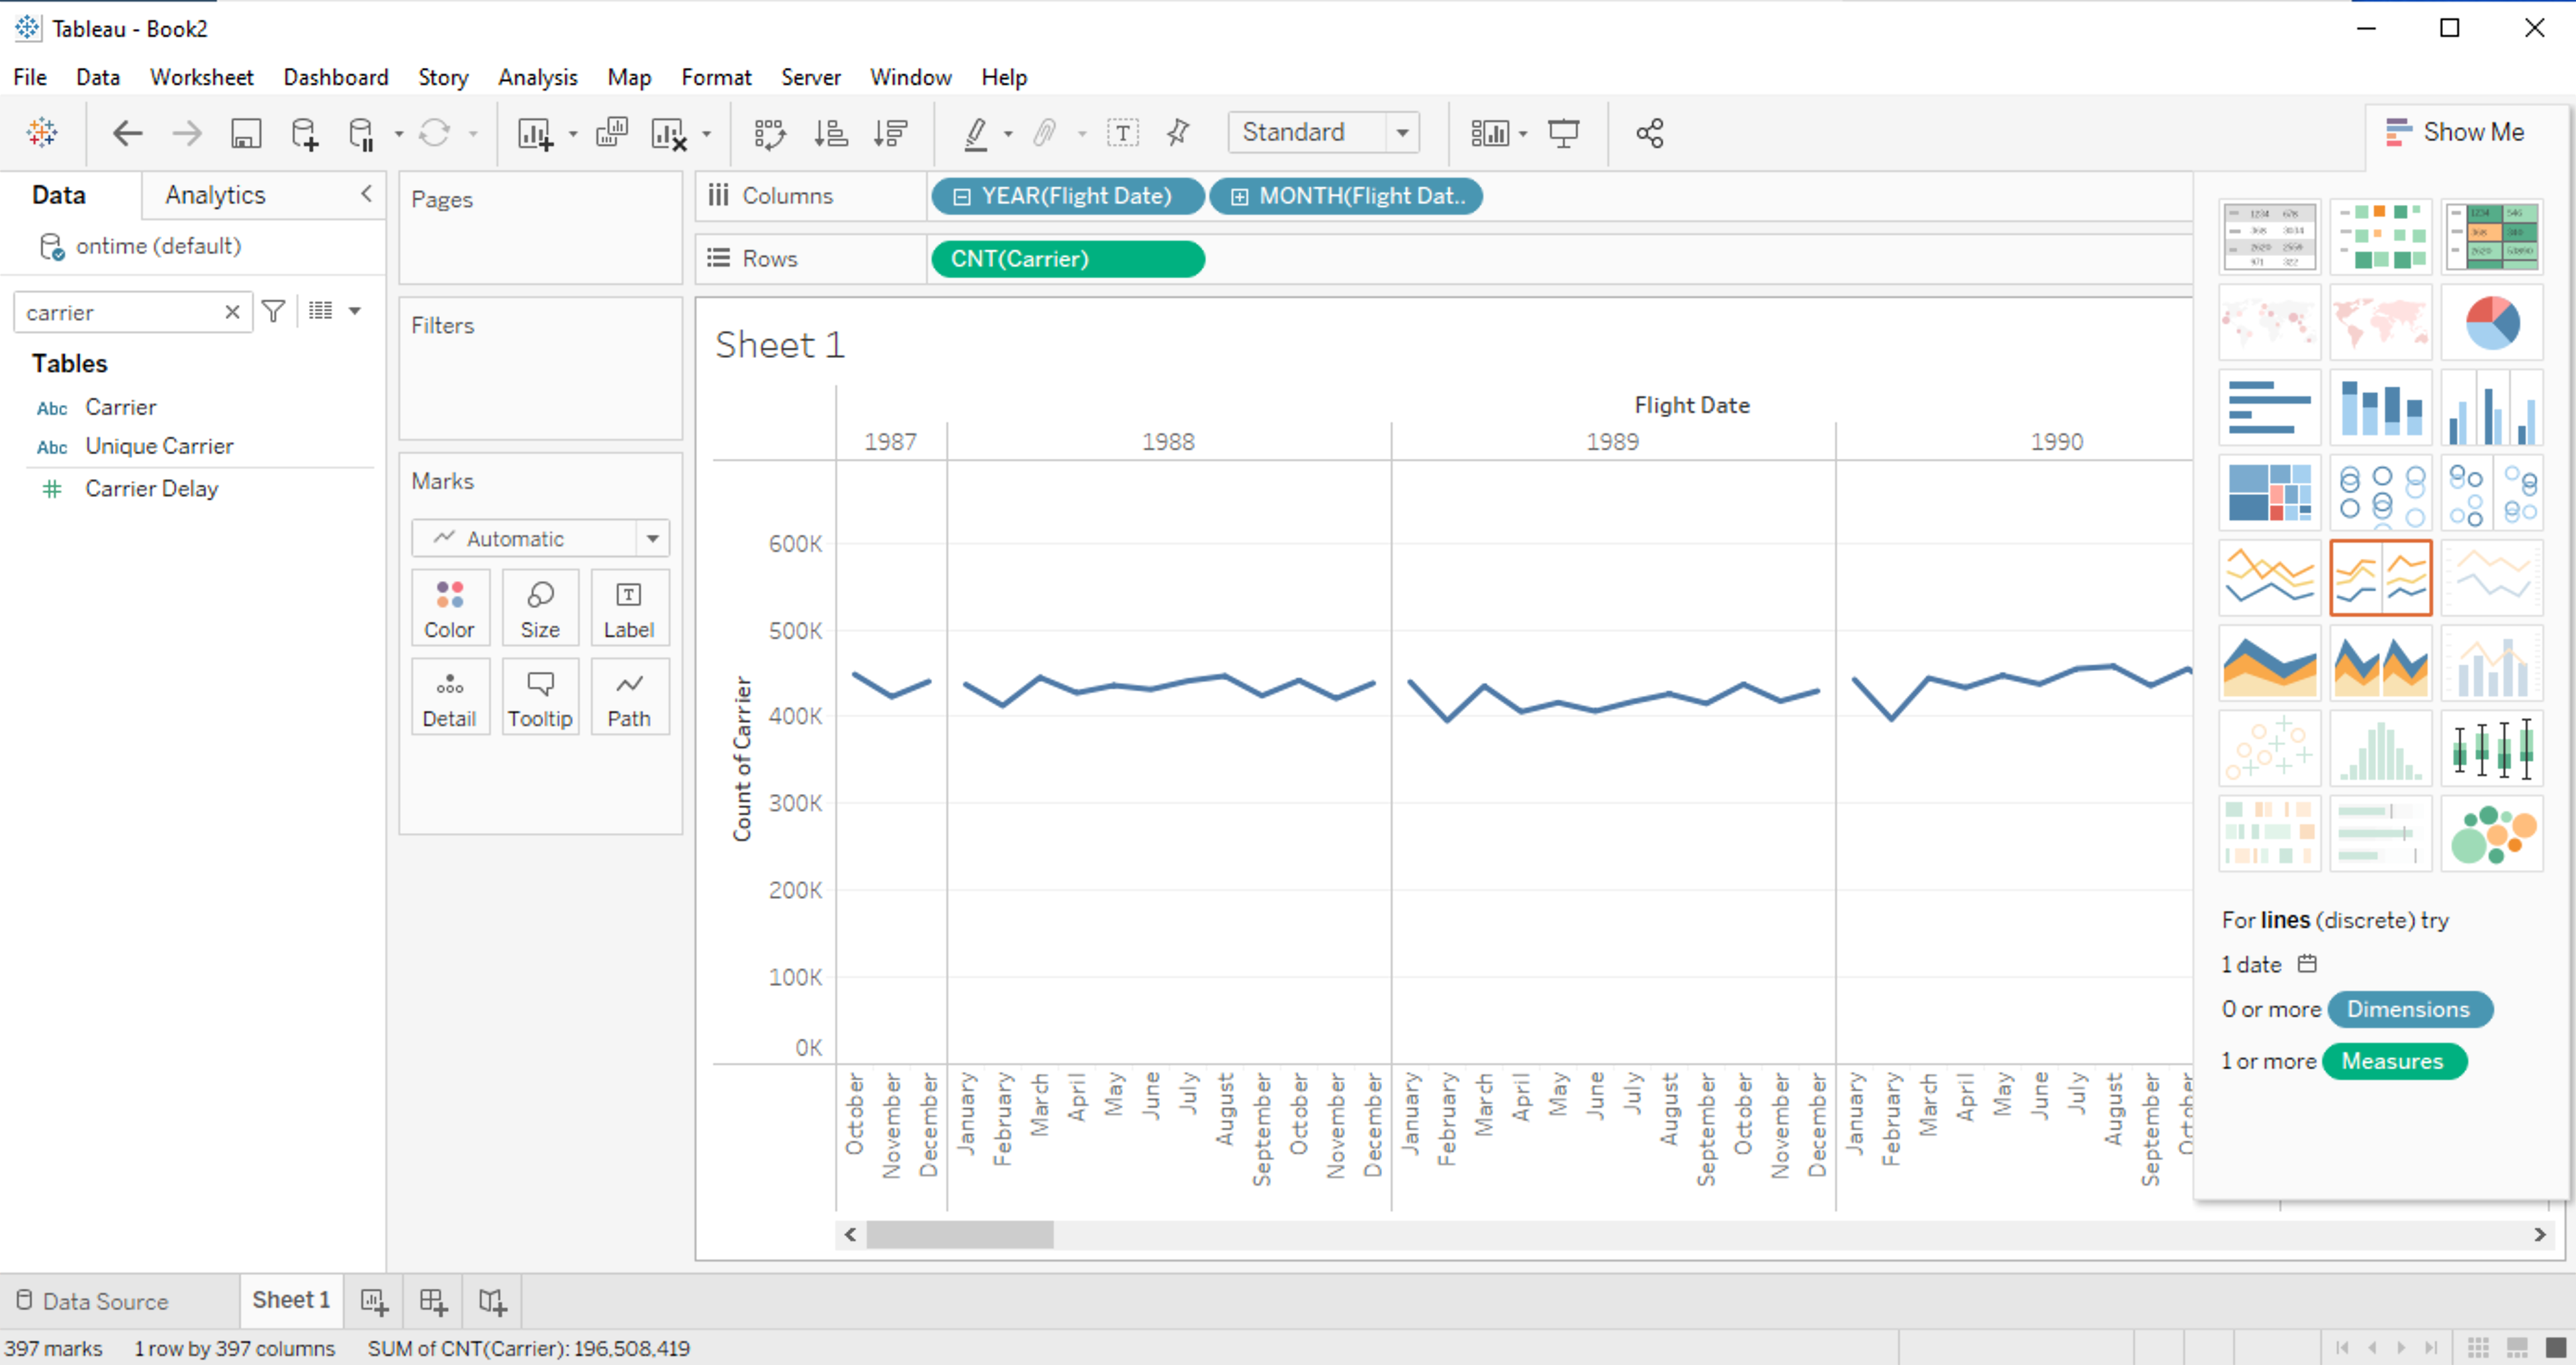
- For this example, we will be using the table ontime, which stores United States flight data.
-
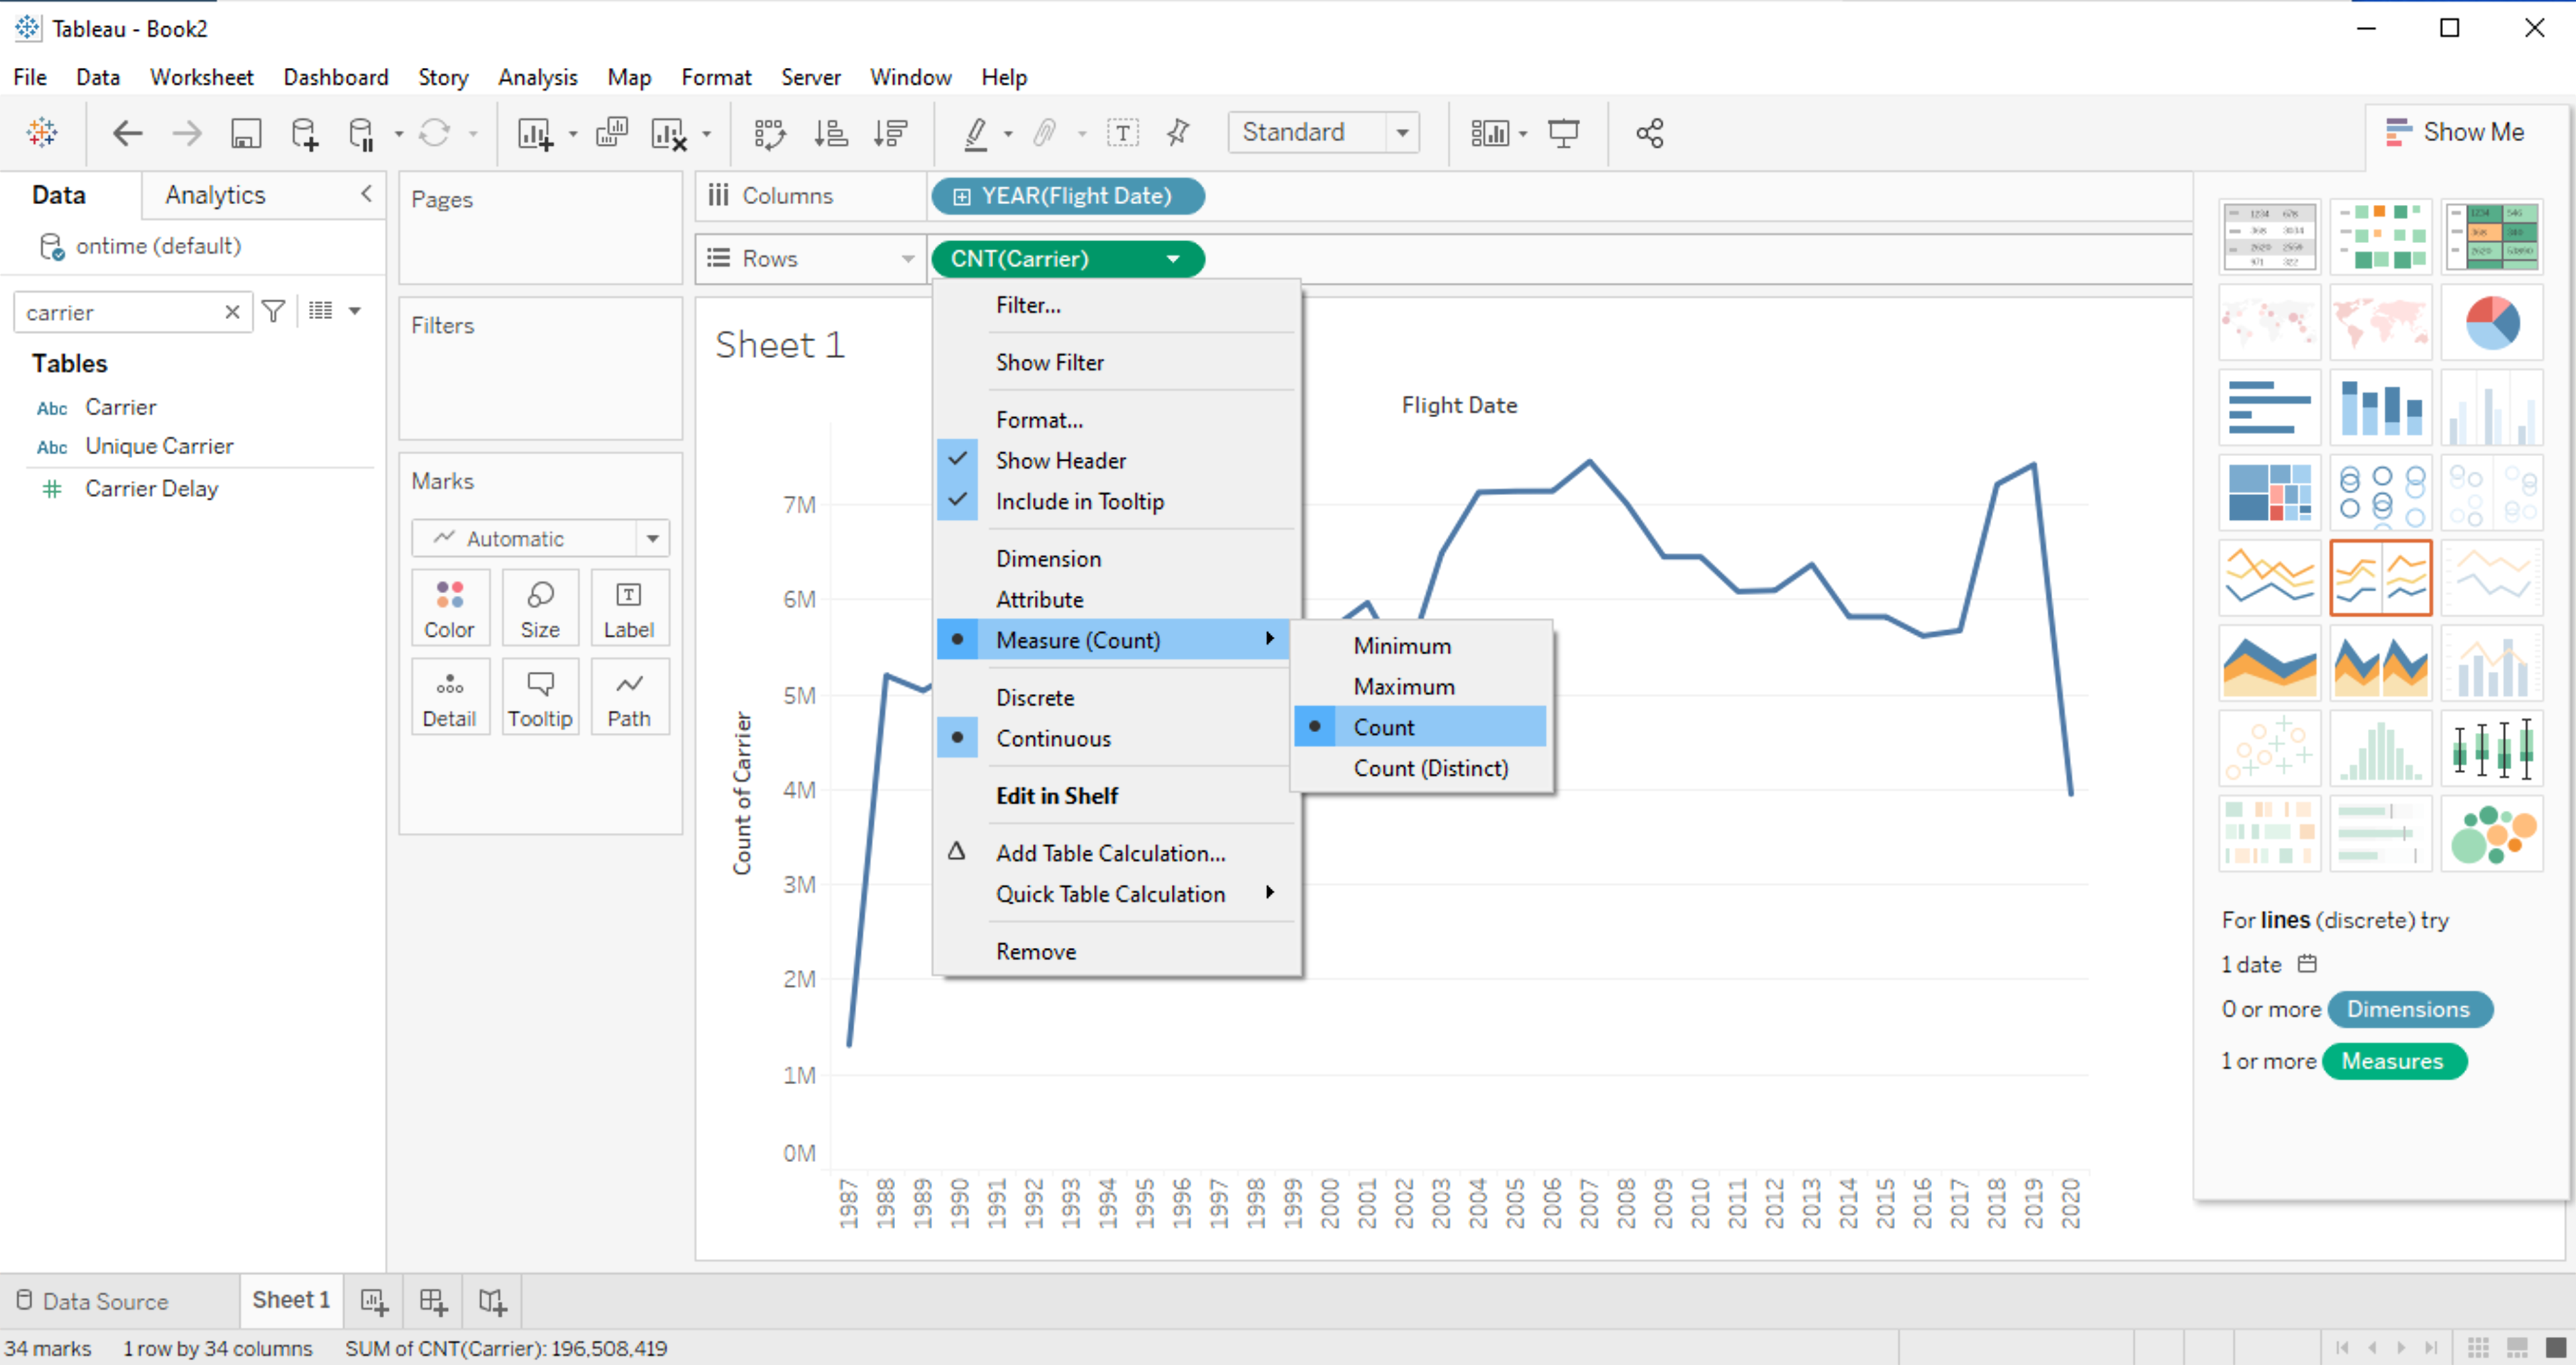
Select the rows and columns to be used by dragging and dropping them into the Columns and Rows fields. Mouse hover over the chart that you want to use to determine what parameters it requires.
- For example, for the Line Chart, 1 data type must be Date, with one or more Dimensions and one or more Measures.
- For this example:
-
Select Flight Date as the Column. Click the arrow and select Year, then the + icon and set the next Flight Date column to Month.
-
Select Carrier as the Row. Click the arrow and select Measure -> Count to convert this value to a Measure.
-
Select Line Chart as the type of chart to use.
-
-
When finished, select the save icon and name the workbook.
SQL Based Query Example
Tableau can use a SQL query generate the data for its tables and charts. To use a SQL query from Tableau Desktop connected to a ClickHouse server:
-
Verify that the ClickHouse Connector for Tableau is installed and the connection is working. For more information, see ClickHouse Connector Installation.
-
Select File -> New.
-
Select Connect to Data.
-
Verify the connection information, then select Sign In.
-
Select “New Custom SQL”.
-
Enter the new ClickHouse SQL Query in the text field, then select OK.
- For this example, the following query is used:
SELECT FlightDate, Origin, Dest,
    oa.Latitude as Origin_Latitude, oa.Longitude AS Origin_Longitude,
    od.Latitude as Dest_Latitude, od.Longitude AS Dest_Longitude,
    Flights, Cancelled, DepDelayed, ArrDelayed
FROM (
SELECT FlightDate, Origin, Dest, count() Flights,
    sum(Cancelled) Cancelled,
    sum(DepDel15) DepDelayed,
    sum(ArrDel15) ArrDelayed
FROM ontime
GROUP BY FlightDate, Origin, Dest ORDER BY FlightDate, Origin, Dest
) AS o
INNER JOIN airports AS oa ON toString(o.Origin) = oa.IATA
INNER JOIN airports AS od ON toString(o.Dest) = od.IATA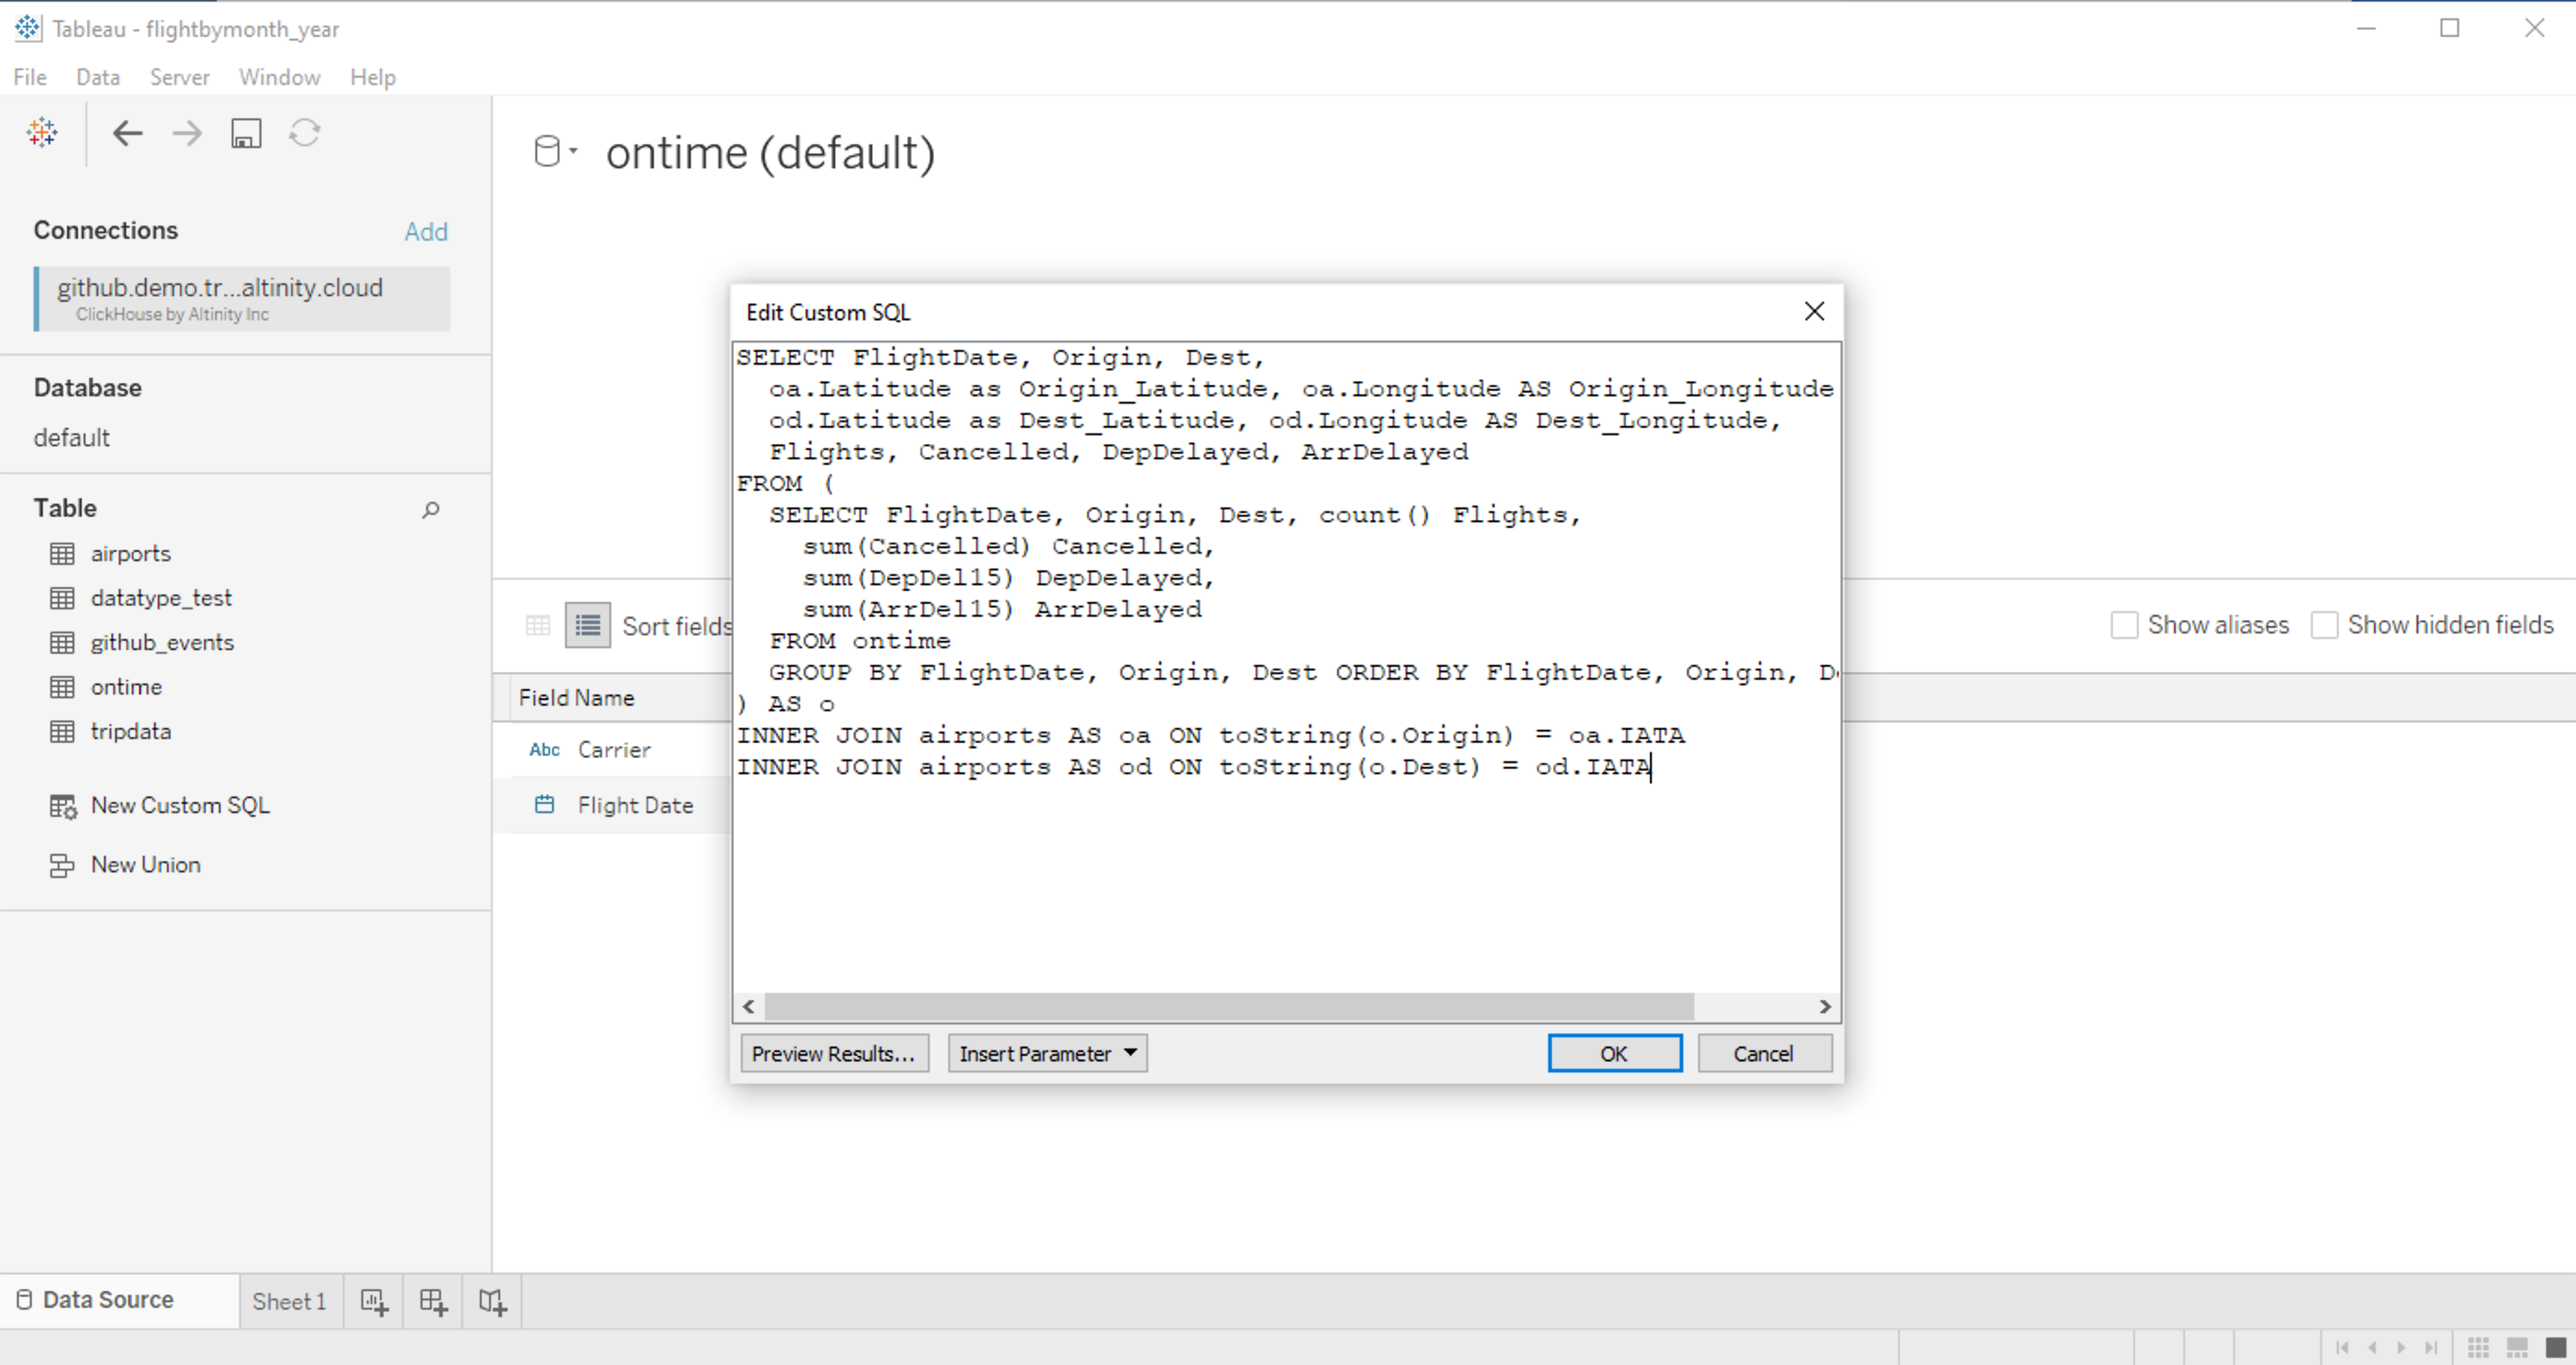
-
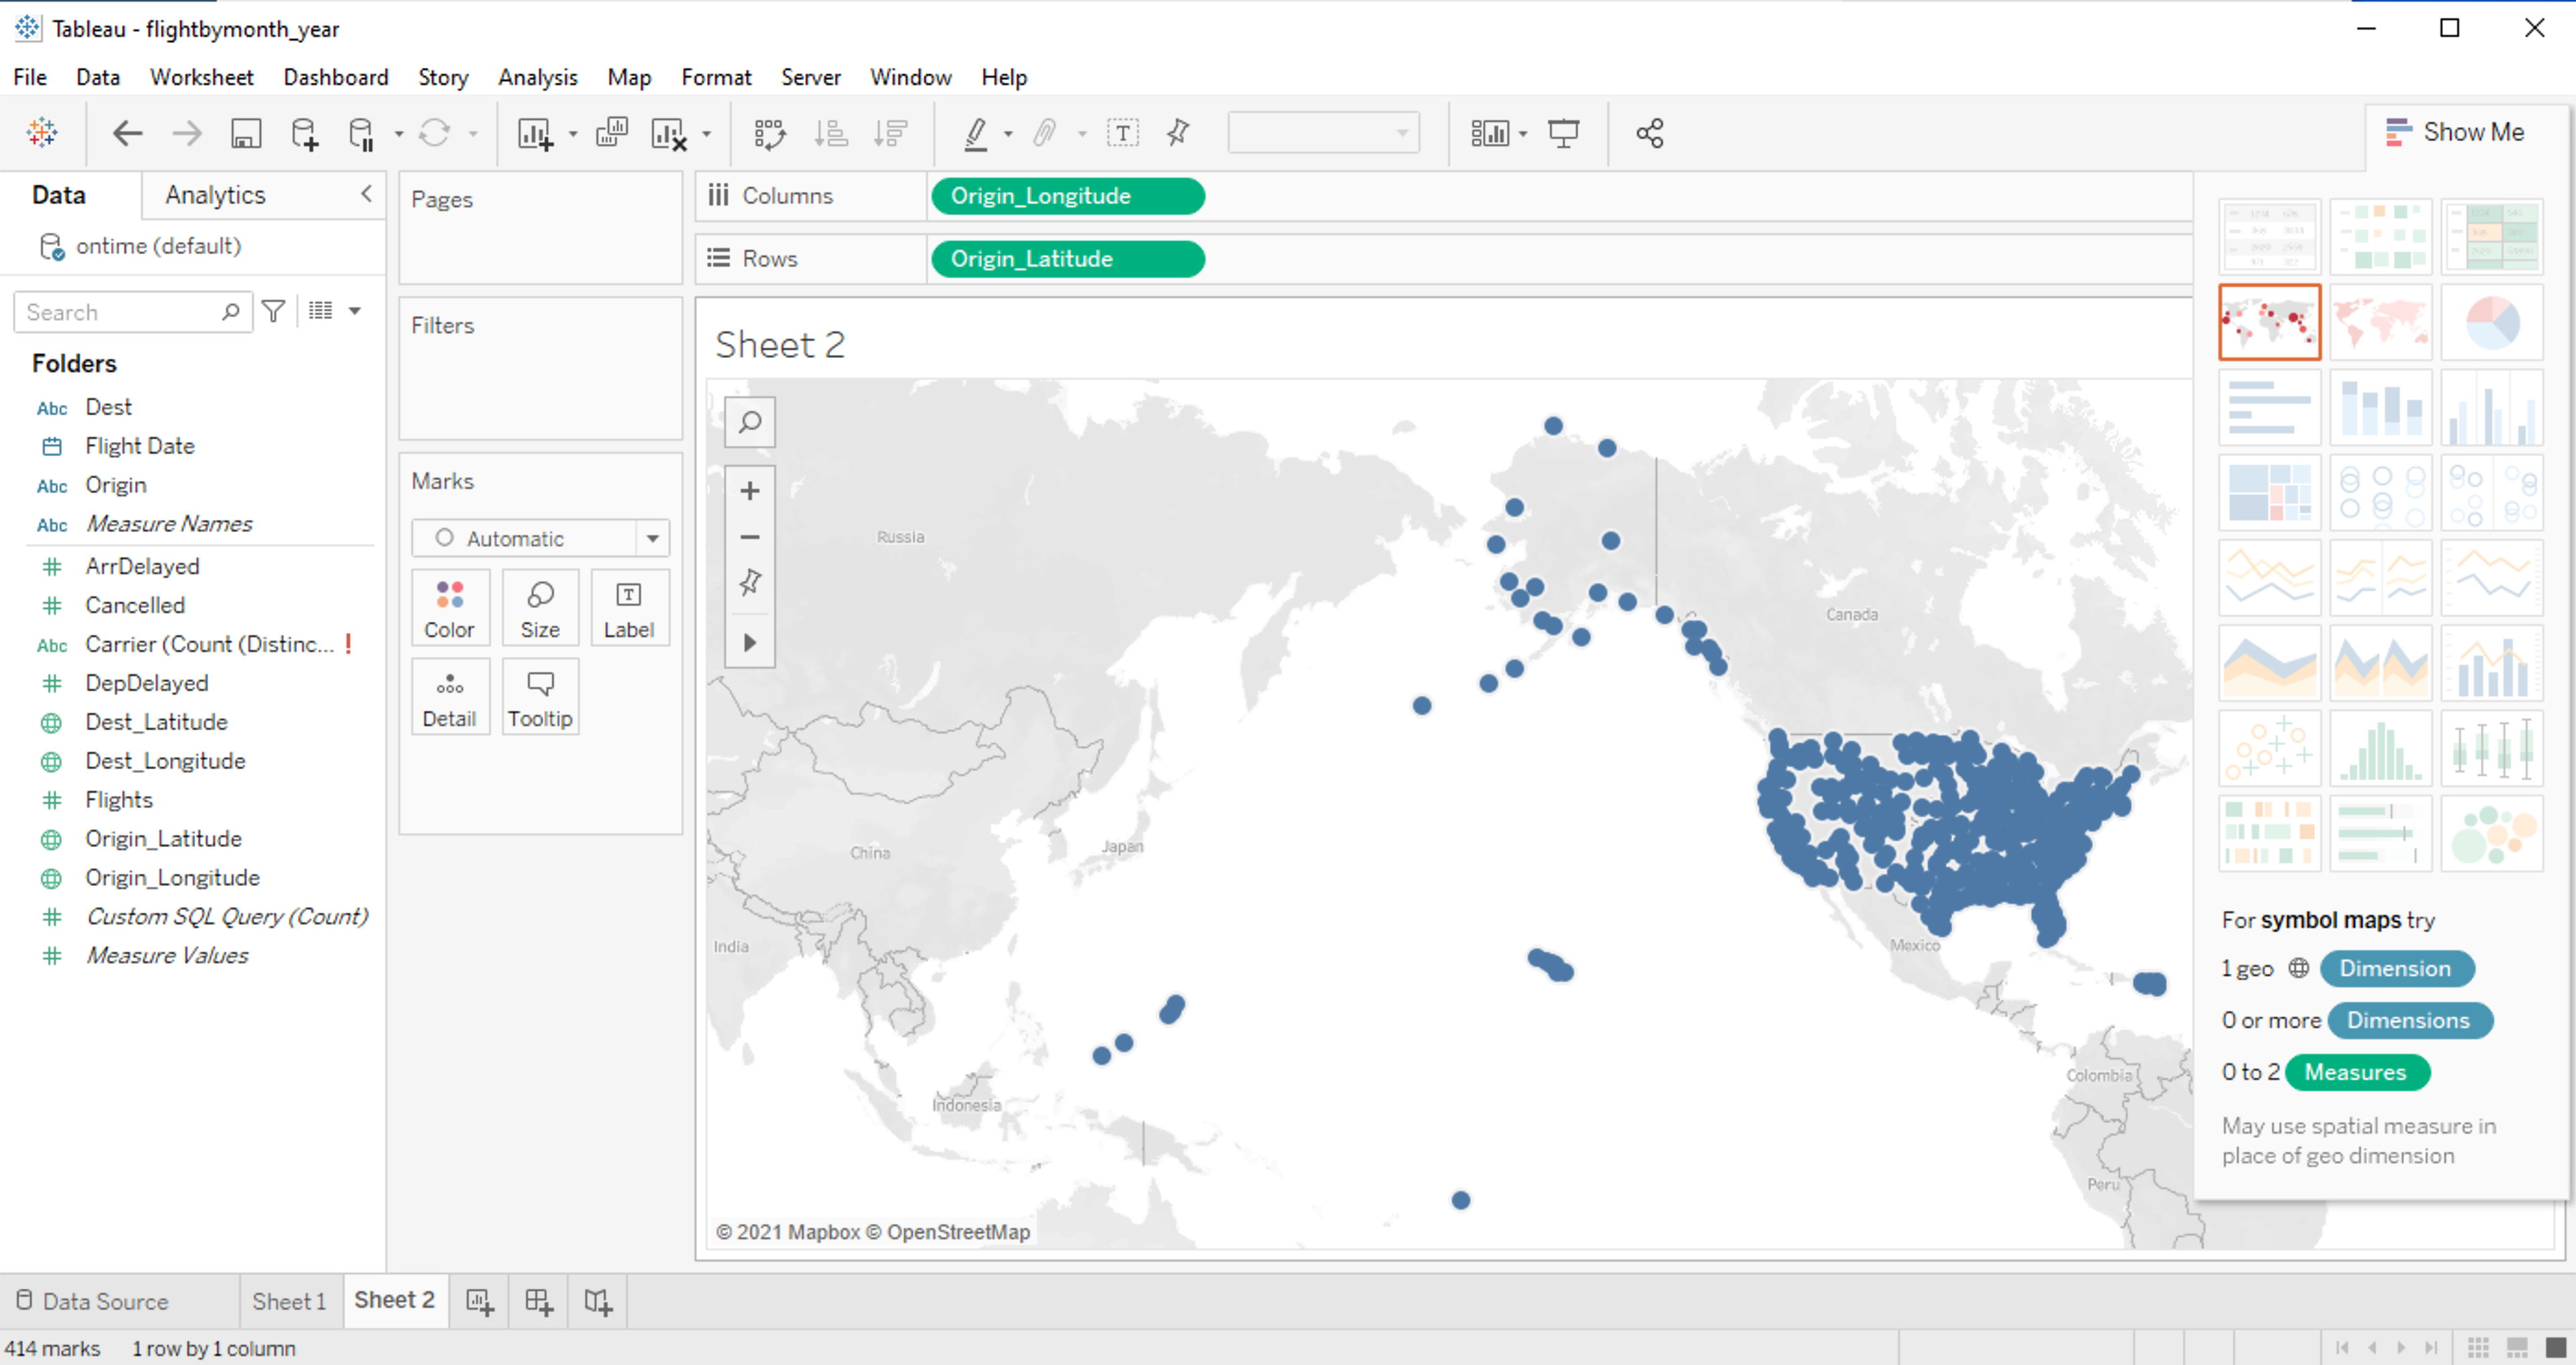
Select the sheet at the bottom - typically this will be Sheet 1 for a new workbook.
-
Select the rows and columns to be used by dragging and dropping them into the Columns and Rows fields. Check on the chart that is to be used to determine how many values and what values will be applied.
- For example, set Origin_Longitude as a Column, and Origin_Latitude as the Row. Select the arrow and verify they are Dimensions. Select the Symbol Map chart. This will display a map with all of the originating flight locations pinned.
-
When finished, select the save icon and name the workbook.