Altinity.Cloud in the AWS Marketplace
AWS users can use Altinity.Cloud for ClickHouse® from the AWS Marketplace to simplify software licensing, procurement, control, and governance. This lets you run Altinity.Cloud in your cloud account.
We cover how to:
- Sign up for a subscription
- Manage your subscription at AWS
- Manage billing
- Terminate your subscription
Signing up for an AWS Marketplace subscription
You can subscribe to the Altinity.Cloud through the AWS Marketplace and get billed through the AWS billing system for the Altinity.Cloud services. There are two simple steps:
- Subscribe to Altinity.Cloud for ClickHouse in the AWS Marketplace
- Register your new account on the registration form if you don’t have one already
To get started, search for altinity.cloud in the AWS Marketplace:
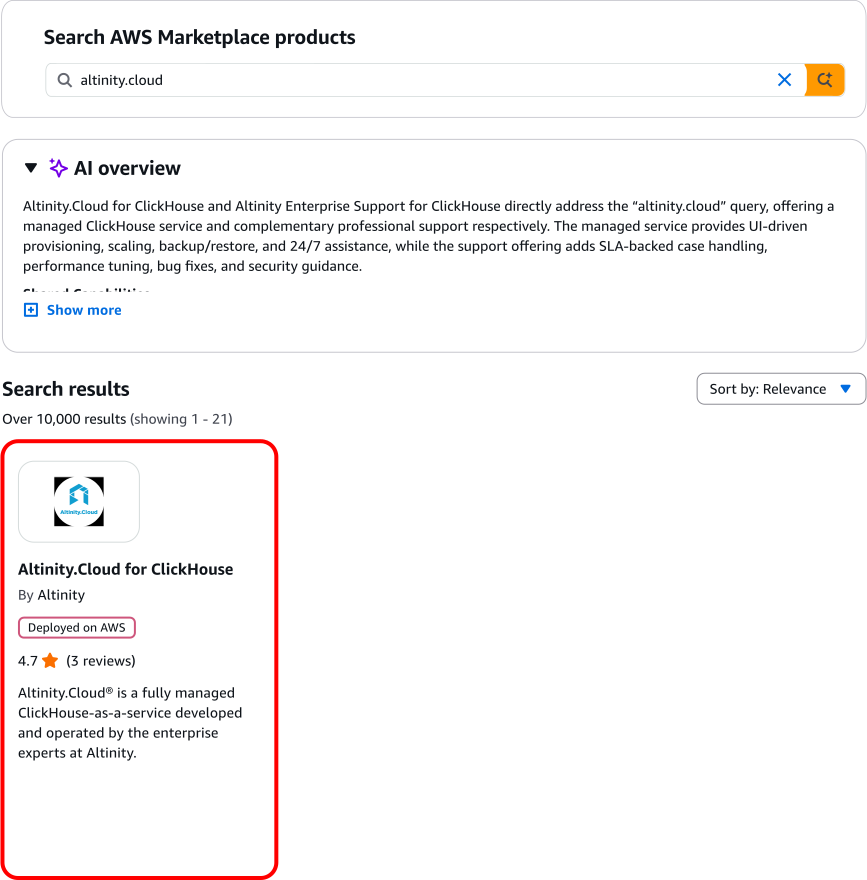
Figure 1 - Search for altinity.cloud
Click on the tile for Altinity.Cloud. You’ll see the product overview page:
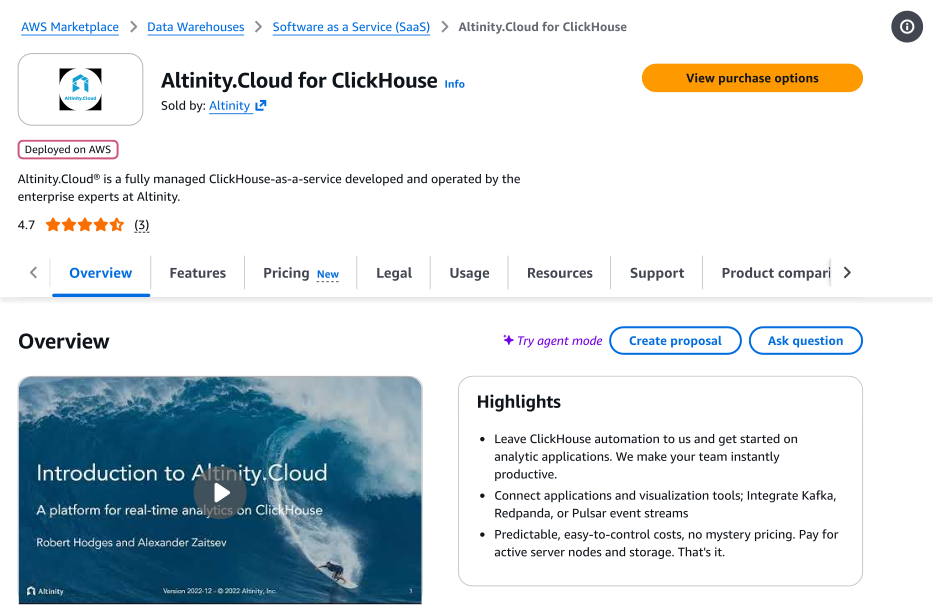
Figure 2 - The Altinity.Cloud product overview page
Click the  button to see the options for your subscription. Here’s an abbreviated version of what you’ll see:
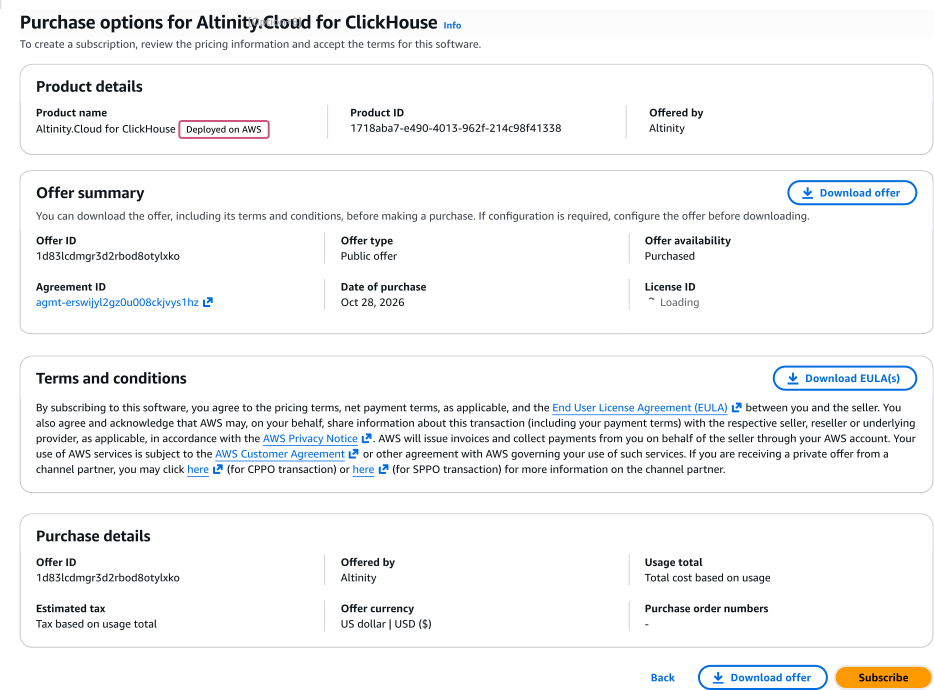
Figure 3 - The Altinity.Cloud product details page
Read through the terms thoroughly. When you’re ready, click the  button.
You’ll get a message like this:

Figure 4 - Marketplace subscription in progress
While the subscription is being set up, click the  button. You’ll arrive at the Altinity.Cloud welcome screen:
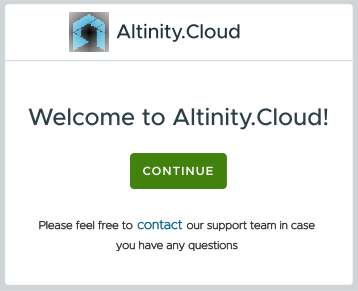
Figure 5 - The Altinity.Cloud welcome screen
Click the CONTINUE button to go to the signup dialog:
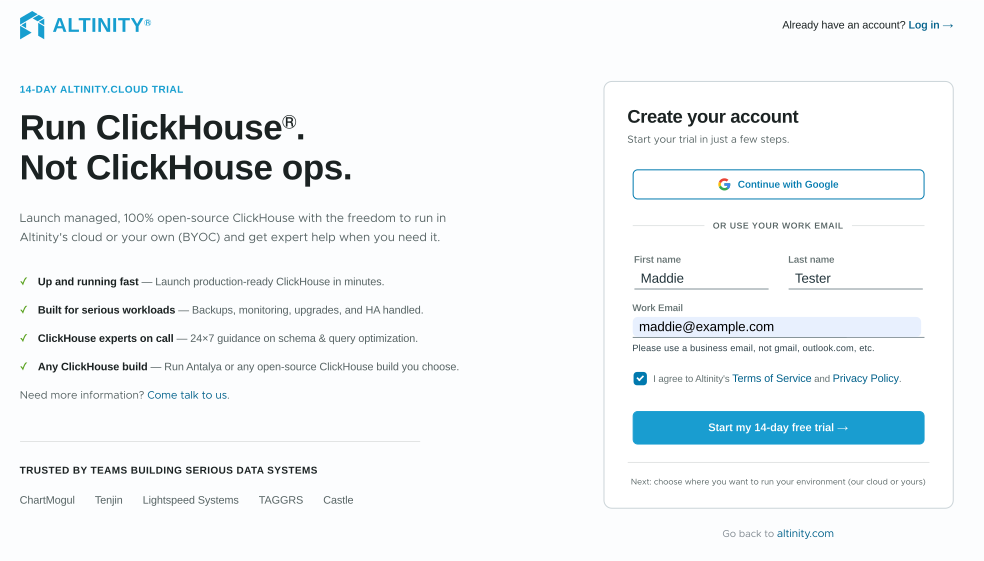
Figure 6 - Signing up for an Altinity.Cloud account
Fill in your details and click the button to start your 14-day free trial. (If you already have an Altinity.Cloud account, click the Log in link in the upper right corner.)
Soon you’ll get an email with a confirmation code:
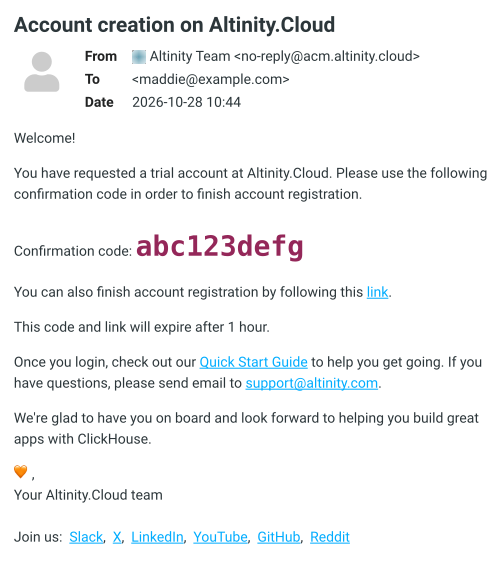
Figure 7 - The confirmation code email
Click the link at the end of the sentence “You can also finish account registration by following this link.” That takes you directly to the dialog to set your password:
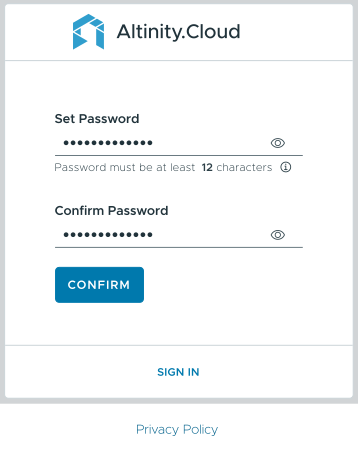
Figure 8 - Setting the password for your new account
Your password must be at least 12 characters long. When you’re ready, click CONFIRM to finish setting up your account. At that point, your Altinity.Cloud subscription is active! You’ll see an empty list of environments:
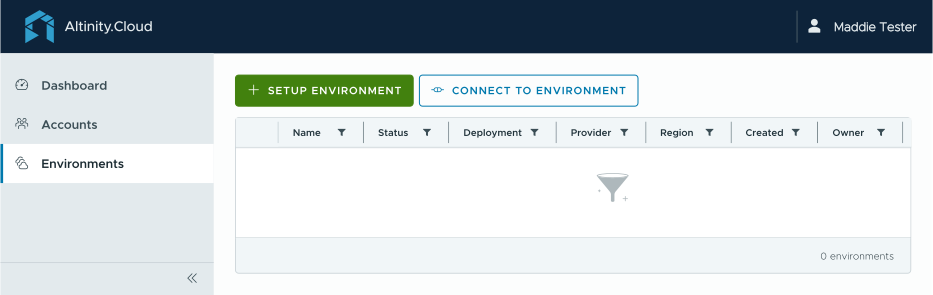
Figure 9 - An empty environment list
Click the  button to get started with a new environment.
If you have any issues with registration or your subscription, please contact the Altinity.Cloud support team.
Managing your subscription at AWS
Go to your AWS Marketplace account and click the Manage subscriptions menu item:
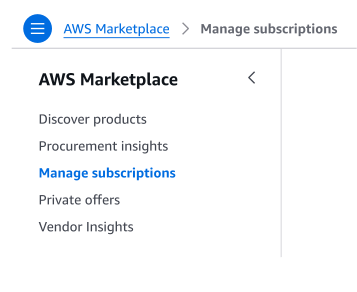
Figure 10 - Managing your subscriptions
Type Altinity to find your subscription, then click the Agreement ID to manage your subscription:
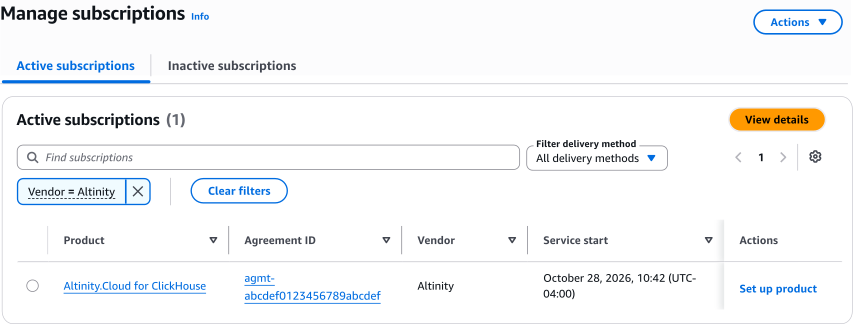
Figure 11 - The list of your Altinity subscriptions
The Actions menu on the agreement page has a variety of options:
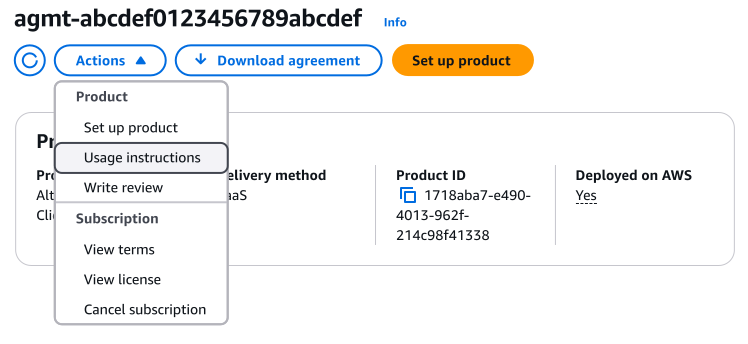
Figure 12 - Options for managing your subscription
Managing billing
By default, your Altinity.Cloud subscription is billed through your AWS account. To manage this, click the Billing menu in the upper right:
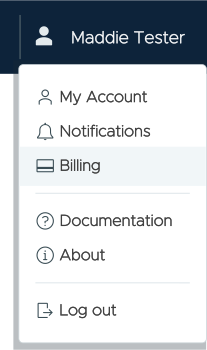
Figure 13 - The Billing menu
You’ll see the details for your account, with the option to modify your payment method:
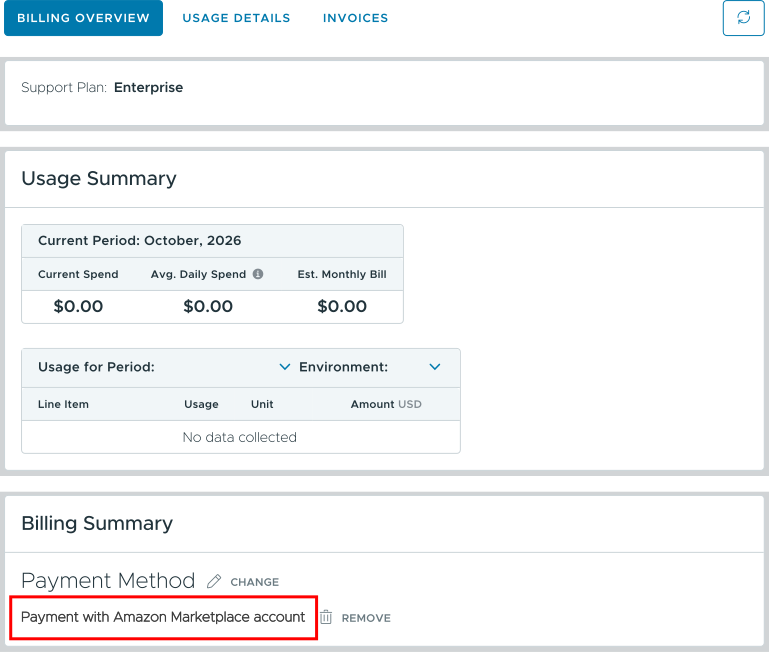
Figure 14 - AWS is the default payment method
Click the  icon to change your payment method.
Canceling your subscription
There are a couple of things you need to do before you delete your subscription:
- Backup and save your data. Your data will be available for retrieval for the period defined in the Altinity.Cloud Terms of Service agreement.
- Stop and delete your clusters.
- Terminate your service as described in the Altinity.Cloud Terms of Service agreement.
To cancel your subscription in the AWS Marketplace, navigate to your subscription agreement as shown in Figures 10 and 11 above. Choose Cancel subscription in the Actions menu:
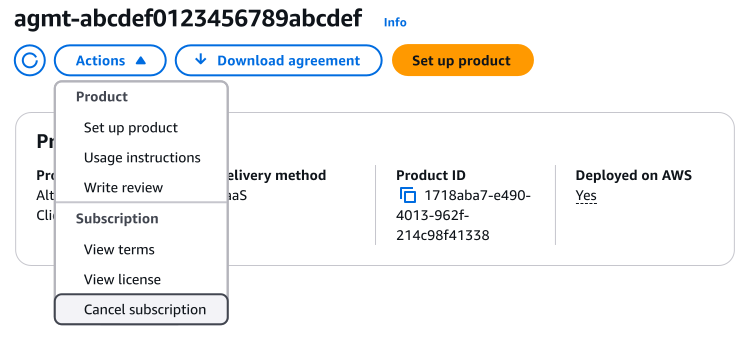
Figure 15 - Canceling your subscription
You’ll see the Cancel subscription dialog:
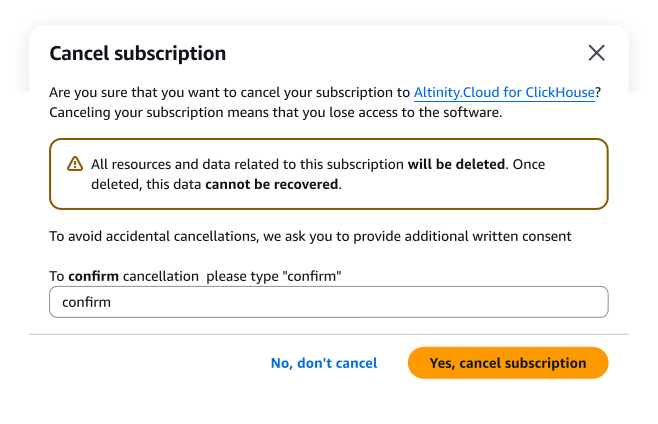
Figure 16 - The Cancel subscription dialog
Type confirm in the entry field, then click the  button. You are now unsubscribed from Altinity.Cloud.